Page 9 of 10
Posted: 19 Jan 2015, 23:31
Huki
evilben74 @ Jan 19 2015, 06:10 PM wrote:Hi jigebren, is it possible to have your revolt addon for Blender please ?
thanks

The plugin is distributed through email, you should PM jigebren and send him your email address so he can include you in the mailing list (hmm if you haven't already...) Please remember to read the
first post in this thread:
jigebren @ Mar 10 2011, 08:10 PM wrote:This plugin is not (yet) available for public download.
Currently I'm only sending it to a few Beta Testers, to get feedback, etc. But if you actually want to try it, you can PM me your email address and I'll add you to the mailing list (which is stored on my own computer and not shared with anyone or any company).
Posted: 21 Jan 2015, 18:01
Teddy PL
Hello,
I'm creating a very unusual car (not very demanding effort) just need advice on how to apply the texture to the right in a white box, how to create parameters for this and car.bmp?.
Do you need to connect the wheel to the body, and what else could be added to a nicer effect?.

Posted: 23 Jan 2015, 14:57
zorbah
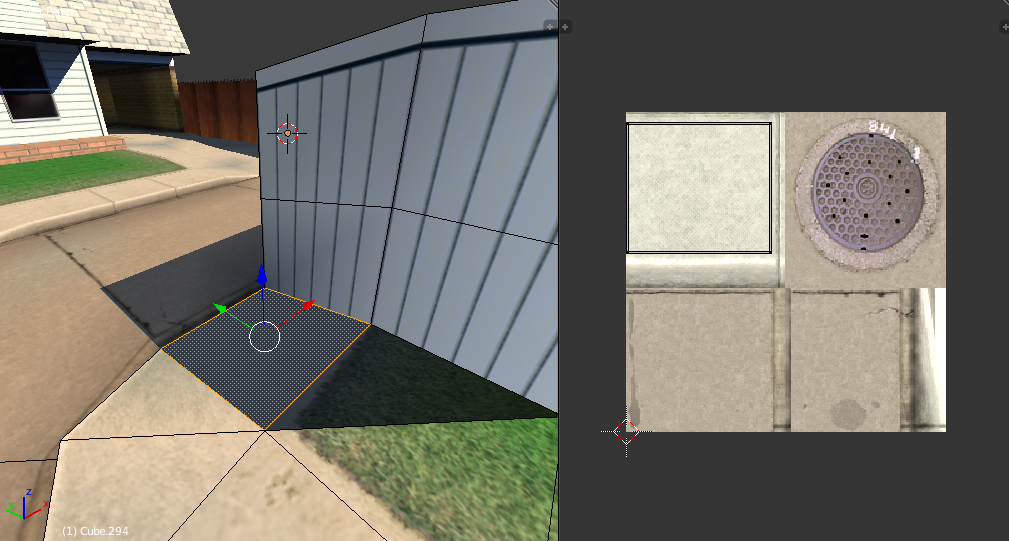
Hey jigebren, I'm not able to export world files and NCP at the same time, by checking the "Also export .ncp" box. it shows this:

But I can export them separately with no problem.
Posted: 23 Jan 2015, 21:27
Abc
I've sent the PM to jig but nothing happened, Jig: did you forgot? :s
Posted: 24 Jan 2015, 22:44
jigebren
Teddy PL @ Jan 21 2015, 01:31 PM wrote:I'm creating a very unusual car (not very demanding effort) just need advice on how to apply the texture to the right in a white box, how to create parameters for this and car.bmp?.
Select your cube, switch to Edit mode [Tab], switch to Face Select mode ([Ctrl+Tab] then [3]), right click on the top face to select it (and make it the active one at the same time), then select all faces with [a]. Press
for the UV Mapping menu, and select Follow Active Quads.
Now in the UV editor, you have to move / rotate / resize the polygons projection until they fit your box image.
Then you can export this cube as "body.prm". don't forget to edit the parameters.txt file so that it points to this "body.prm" file as well as your "car.bmp" texture file.
Teddy PL wrote:Do you need to connect the wheel to the body, and what else could be added to a nicer effect?.
None of this has to be done in Blender. You need to have separated PRM files in your car folder for body and wheel, then everything is done just by editing the parameters.txt file in the Notepad of your choice.
zorbah wrote: I'm not able to export world files and NCP at the same time
Thanks for the report, I'll check that.
Abc wrote:I've sent the PM to jig but nothing happened, Jig: did you forgot? :s
No, I did send it to your gmail address 14 days ago, along with other beta-testers...
Posted: 03 Feb 2015, 22:43
zorbah
I got a small problem, it's not a big deal but can it get really anoying when using blender for a preview of a repaint or something like that. Every time the image is reloaded at the UV editor (Alt + R) the transparency goes off:

To get the transparency back one have to reset blender
Also, I'd like to know if there is a way to get a color of an already painted vertex (not the actual color of the model, the one used to color a vertex) . That would be awesome for remodeling levels.
Posted: 03 Feb 2015, 23:32
jigebren
zorbah @ Feb 3 2015, 06:13 PM wrote:Every time the image is reloaded at the UV editor (Alt + R) the transparency goes off
Yes, that the purpose of the "ColorKey" button in the Texture section of the Re-Volt panel (in Object mode), because Blender has no way to display the texture like in Re-Volt, it's the plugin that allow to convert each black pixel to a transparent pixel (Re-Volt does just the same internally BTW).
I just noticed though that it's no longer working... The texture is properly updated (you can see it in the UV editor) but the changes are not reflected in the 3D view. It has probably been broken by a Blender update. Now I hope it's just an "update texture" instruction missing and not a Blender bug.
I'd like to know if there is a way to get a color of an already painted vertex
Not a straightforward one that I know. I found a kind of workaround though:
Switch to WireFrame display (with [z] key), then go to Vertex paint mode (that way the model is no longer shaded but we can still see the faces). Then in the left panel click on the brush color, select the Sample tool and use it onto the face you want to get the color from.
Posted: 06 Feb 2015, 00:41
RV_Pure
Little question jigebren. I would like show some pictures about a planned track. Can i present the pictures here in this topic?
Posted: 06 Feb 2015, 02:14
jigebren
@RV_Pure
If the point is just to illustrate what we can do with the plugin it's perfectly fitted here, otherwise I think you'd get a better exposure by opening your own thread (in case you plan to post update of your WIP track to get feedback, etc.). But thanks for asking anyway.
We may eventually create a section dedicated to this plugin instead of a single thread, in that case there would be a place for car or track makers to expose their work. So far it was not really worth it as long as the plugin is not public, but if I ever take time to rework my website and write the Blender plugin documentation I could consider releasing it finally.
Posted: 08 Feb 2015, 08:17
Teddy PL
I thought it would have been nice to have a pack of little Hot Wheels cars and normal versions so I would try to change the Hot Wheels cars on the normal size, and here is my question arises:
How to do it and whether it is at all possible?.
Posted: 08 Feb 2015, 17:31
sebr
1) IMPORT the PRM you wish to resize in Blender
2) EXOPRT it again with a different Scale ...

3) don't forget to do the same with wheels and HUL file
Posted: 08 Feb 2015, 19:52
jigebren
Though Sebr method works, I would not recommend it. This scale setting was rather implemented to ensure Re-Volt object has a convenient size in Blender (that's why it's not the same for a simple object (extra x10 factor) and for a whole track).
So here is the proper way to do it. As far as Blender is concerned:
1) Import the PRM (or HUL).
2) Resize it (press , then either move your mouse and left-click or enter a scale value like eg. 1.25 on the keyboard and press [Enter]).
3) Export the PRM (or HUL)
Then edit the parameters.txt file to apply the same scale to Offset, Wheel radius, COM, etc. Likely something has to be done with the mass (cubed scale?) and the Intertia matrix as well.
Posted: 08 Feb 2015, 20:11
Abc
Forgot to ask: is blender 2.73a (download page latest) the right version?
Also, 64 or 32?
Posted: 08 Feb 2015, 20:47
sebr
It is for Blender 2.73 (but 2.73a might work)
you can use 32 or 64 bit version
note : I always choose 32bit version (sometime 64bit add extra bugs)
Posted: 08 Feb 2015, 21:17
Citywalker
Teddy, someone once asked the same question at RVL forum, and I gave him the same info I’m going to give you (he didn’t do his project).
You will need to change (recalculate) the parameters for each upscaled Hot Wheels car. Back then, I made a
spreadsheet (MS Excel xls file, also opens in Google Docs). In that file, the columns in bold (thick black colour) are automatically calculated new upscaled values for the bigger Hot Wheels cars. Resize the small cars 4x bigger and you can use the bold values in the new parameters.txt files.
Posted: 09 Feb 2015, 01:04
revolting

and don't forget to get the hot wheels' wheels similar to this description: "The wheels and their structure appeared to glow like chrys′o·lite, and the four of them looked alike. Their appearance and structure looked as though a wheel were within a wheel. When they moved, they could go in any of the four directions without turning as they went. Their rims were so high that they inspired awe, and the rims of all four were full of eyes all around.Whenever the living creatures moved, the wheels would move along with them, and when the living creatures were lifted up from the earth, the wheels would also be lifted up. They would go where the spirit inclined them to go, wherever the spirit went. The wheels would be lifted up together with them, for the spirit operating on the living creatures was also in the wheels. When they moved, these would move; and when they stood still, these would stand still; and when they were lifted up from the earth, the wheels would be lifted up together with them, for the spirit operating on the living creatures was also in the wheels."
Posted: 10 Feb 2015, 05:25
Abc
sebr @ Feb 8 2015, 12:17 PM wrote: It is for Blender 2.73 (but 2.73a might work)
you can use 32 or 64 bit version
note : I always choose 32bit version (sometime 64bit add extra bugs)
Well for some reason I'm not seeing revolt plugin in import and/or export
Posted: 10 Feb 2015, 05:31
jigebren
Abc @ Feb 10 2015, 12:55 AM wrote: Well for some reason I'm not seeing revolt plugin in import and/or export
Have you followed the instruction in the newsletter?
Hmm, and are you using the default path for the Blender Scripts or have you set your own path?
I'm installing 2.73a to confirm...
EDIT: 2.73a working.
You should also check the Blender console (Menu: Window / Toggle System Console) for any error message.
Posted: 10 Feb 2015, 06:50
Abc
Apologies, I've missed the "enable" part
Posted: 10 Feb 2015, 07:41
jigebren
Abc @ Feb 10 2015, 02:20 AM wrote:Apologies, I've missed the "enable" part
D'oh!
jigebren @ Feb 3 2015, 07:02 PM wrote:zorbah @ Feb 3 2015, 06:13 PM wrote:Every time the image is reloaded at the UV editor (Alt + R) the transparency goes off
Yes, that the purpose of the "ColorKey" button in the Texture section of the Re-Volt panel (in Object mode), because Blender has no way to display the texture like in Re-Volt, it's the plugin that allow to convert each black pixel to a transparent pixel (Re-Volt does just the same internally BTW).
I just noticed though that it's no longer working... The texture is properly updated (you can see it in the UV editor) but the changes are not reflected in the 3D view. It has probably been broken by a Blender update. Now I hope it's just an "update texture" instruction missing and not a Blender bug.
This part has been fixed. I can't tell whether it's a bug or a badly documented behavior of Blender, I have just found something that works, but the magical spell may break someday.

BTW I was thinking about making the ColorKey button also reloads the image from file before updating the transparency (you wouldn't even have to press Alt+R then). I don't think anyone uses the texture drawing of Blender, otherwise let me know, because those changes would be lost.
EDIT:
zorbah @ Jan 23 2015, 10:27 AM wrote:Hey jigebren, I'm not able to export world files and NCP at the same time, by checking the "Also export .ncp" box. it shows this:
[...]
But I can export them separately with no problem.
This is fixed too.
Posted: 11 Feb 2015, 07:14
revolting
[OFFTOPIC]good fixes huki
BTW I was thinking about making the ColorKey button also reloads the image from file before updating the transparency (you wouldn't even have to press Alt+R then). I don't think anyone uses the texture drawing of Blender, otherwise let me know, because those changes would be lost.
dunno, never have I been modeling
FOCUS ON HOW YOUR WORK BENEFITS OTHERS
Avoid the trap of thinking only about how much money you are earning. Rather, ask yourself such questions as these: ‘Why is this job necessary? What would happen if it wasn’t done—or it wasn’t done right? How does my work benefit others?’
Keep it up dude
[/OFFTOPIC]
Posted: 21 Feb 2015, 06:59
zorbah
Hey Jigebren, I'm greatful for the great work on this awesome tool and for the attention you gave to me and others till now. Another thing: Would be really helpfull if I could set a flag on selected faces instead of applying it face by face, would save a lot of time. Thanks a lot
Posted: 21 Feb 2015, 07:21
jigebren
@zorbah
I think you've just missed the Apply button in the Faces Selection panel.

Posted: 21 Feb 2015, 08:03
zorbah
Oh nice! nevermind than, thanks
Posted: 27 Feb 2015, 07:44
jigebren
Just sent a new release. Mostly bug fixes, and also because there's was a few subscriptions pending.
Here's the changelog:
Code: Select all
2015.02.27 (Blender 2.73a)
--------------------------------------------------------------------------------

FIX: When updating a texture in the Image Editor ([Alt+R]), the Colorkey
transparent pixels turn to black and you have to use the ColorKey button in the
Texture section of the Re-Volt panel to make them transparent again. But the
change were not updated in the 3D views. This should be fixed now.

MOD: Using the ColorKey button will also reload all the textures from file (it
means you'd better use this button instead of the Blender [Alt+R] shortcut when
working for Re-Volt).

FIX: The "Also export .ncp" to export the NCP at the same time when exporting a
W didn't work.
Posted: 11 Mar 2015, 18:59
zorbah
It seems flawless to me,
what are your plans for the plugin jigebren?
Posted: 12 Mar 2015, 04:45
jigebren
Glad to hear that.
zorbah wrote:what are your plans for the plugin
Well, absolutely none at this time... Eventually I'd like to write some kind of documentation for the plugin & about using Blender for Re-Volt, but for this I'd have to update my website, and for this I'd have to find and learn a good static web generator, and for this, I lack time.
Posted: 31 Mar 2015, 20:44
Kenny
Hmm, I was just wondering if the scale setting for importing files is there for more than just convenience / better viewing?
Because when I try to display (vertex) coordinates from an imported .w file with a 1.0 scale, it won't show numbers higher than 10000.0 (but rather just displays that number instead), is that a blender internal limit or a limit/bug of the plugin?
I'd be surprised if blender wouldn't be able to show higher numbers, manipulating the vertices in these "out of bound" areas still seems to work fine.
Also do I just have to keep the scale in mind when converting between two formats that use a different scale by default or is it also something to keep in mind when exporting a scaled imported file of the same format?
And since I'm already writing this, it would very helpful if there was a way to display in a .w file what cubes are assigned to which big cubes (when checking the 'Import Big Cubes' option), assuming there isn't already a way to do this.
PS: I think its time to either update the blender version number in the title or just completely remove it

Posted: 31 Mar 2015, 22:33
jigebren
Well, the scale is here for convenience in a first time, and to avoid such issues in a second time. Originally there was, for example, also issue with the clipping start / end distances, though the plugin now takes care of updating them according to the selected scale.
The 10000 limit is a Blender limit, maybe only for the interface but I can't tell (I found a few references to it but no official doc). It was very easy to check that : use the default cube in Edit mode, select the top face, move it up to +10000 ([G], [Z] then [10000]), move the view to the face ([.] on the numpad), then with the mouse move it up and down. You'll see the the display coord is capped to 10000, and the plugin is not involved at all here.
Also do I just have to keep the scale in mind when converting between two formats that use a different scale by default or is it also something to keep in mind when exporting a scaled imported file of the same format?
The only thing you have to ensure is that you're using the same scale when importing and when exporting. Follow that simple rule and everything should be fine.
For info the
Scale is always the
scaling down factor apply when
importing. You don't have to invert it when exporting, it's done automatically. If for any reason you've used the x10 factor and the option in not available for the format you're using, then just
divide the Scale by 10, it has exactly the same effect (both at exporting and importing as I said above).
Otherwise there's likely no valid reason to play with that Scale setting unless you're looking for trouble. Even if you do want to change the object size, I would rather recommend to use the Blender size tool instead.
it would very helpful if there was a way to display in a .w file what cubes are assigned to which big cubes
In the original v2.49 version, I was parenting the cubes to their big cube. I have never updated that part in the 2.5+ version as it's apparently not much used and is rather useless except for informational purposes. But I'll keep that in mind for the next release.
Posted: 01 Apr 2015, 00:26
Kenny
jigebren @ 31 Mar 2015, 06:03 PM wrote: The 10000 limit is a Blender limit, maybe only for the interface but I can't tell (I found a few references to it but no official doc).
Interesting, you would think that a well-established program like Blender would feature higher limits (even if its just for the interface) or at least have it officially mentioned somewhere, I guess I'll just have to work with the scaling option then.
jigebren @ 31 Mar 2015, 06:03 PM wrote:For info the Scale is always the scaling down factor apply when importing. You don't have to invert it when exporting, it's done automatically.
I guess its a bit confusing that bigger numbers get used to scale something down in a setting that is simply called "Scale" (at least I didn't notice it until I compared the coordinates).
I had a similar misunderstanding with exporting since I initially assumed that the "Scale" setting there would still work in the same direction (so an imported x10 scaled down model would be again scaled down x10 when exporting making it x100 times smaller than the original one).
Perhaps a setting name like "Downscale" for import and "Upscale" for export would be more obvious? Or invert the scaling numbers for imports (so x10 would become x0.1)?
But I guess thats just for people who tend to overthink things
jigebren @ 31 Mar 2015, 06:03 PM wrote:In the original v2.49 version, I was parenting the cubes to their big cube. I have never updated that part in the 2.5+ version as it's apparently not much used and is rather useless except for informational purposes. But I'll keep that in mind for the next release.
Thanks, it would help me track down an
original bug/issue from the Track Editor (second half of that post) though I should be able to figure it out sooner or later anyway so its not that essential (but again, it would be helpful).
Also if it would additionally be possible to (re)assign cubes to big cubes then people could make use of the viewing frustum optimization of the game (though I guess considering that barely anyone effectively uses visiboxes in custom tracks, this feature would suffer a similar fate).
Posted: 01 Apr 2015, 02:17
jigebren
About the -10000 / 10000 limit I have no more info that you... I found in
this thread someone mentioning this limit, but as I said, nothing official. This might also be only a limit of the interface.
Kenny wrote:I guess its a bit confusing that bigger numbers get used to scale something down
Well, I could just as well have said that the
Scale is the
scaling up factor apply when
exporting, in that case it turns to be perfectly obvious.
I found it more user friendly for most people to use 100 than 0.01, and to follow the simple rule that using the same Scale value guarantees that exporting and importing will work the same way (but I could be wrong).
The fact is I let this setting available mostly to show that we're not working in Re-Volt units inside Blender, but this does not mean this settings really have any reason to be modified in a regular use (that why I added the redundant x10 settings, because this one is the only one you really have to use if you need a more comfortable scale for eg. cars).
Kenny wrote:Also if it would additionally be possible to (re)assign cubes to big cubes then people could make use of the viewing frustum optimization of the game
This is rather a job for my other tool
WorldCut. I'm not sure it would be nice to allow re-exporting of the same BigCubes, as if the user makes any mistake or change the size or position of a polygon, the old BigCubes may no longer fit and it'll create visual glitch.
You know that when exporting from the Blender plugin each object is a Cube (that is to say it has it's own bounding box for view frustum optimization already). If you run the exported .W file though WorldCut, and deactivate all options but the last one "Creates BigCubes", then WorldCut will not cut or merge the existing Cubes, but it will cluster them in BigCubes according to the grid you set. It should give something quite similar if not almost identical to the original BigCube layout (I think I've picked the default grids setting to give something close to the stock tracks layout).
If you feel like trying this, I'd be happy to hear about the result BTW...
Posted: 01 Apr 2015, 13:59
Kenny
jigebren @ 31 Mar 2015, 09:47 PM wrote: About the -10000 / 10000 limit I have no more info that you... I found in
this thread someone mentioning this limit, but as I said, nothing official. This might also be only a limit of the interface.
After investigating a bit more it seems that you need to increase the "Scale" setting (unfortunate name collision
) in the View Properties[N]->Display panel to make it display higher numbers.
I guess this was done because floating point numbers lose accuracy with higher numbers?
Still doesn't explain why thats not done automatically or why they haven't worked around that issue yet (especially since it only seems to affect the interface), but I guess thats a different matter and the plugin scale moreless resolves this problem anyway.
jigebren wrote:This is rather a job for my other tool
WorldCut. I'm not sure it would be nice to allow re-exporting of the same BigCubes, as if the user makes any mistake or change the size or position of a polygon, the old BigCubes may no longer fit and it'll create visual glitch.
I never worked with that tool previously so I didn't know that it has this feature. A quick test with a lego track seems to produce fine results though, can't really say for sure since I don't see which cubes are assigned to the big cubes but at least the big cubes properly encapsulate all relevant areas.
Posted: 09 Apr 2015, 19:13
jigebren
Kenny @ 1 Apr 2015, 09:29 AM wrote:A quick test with a lego track seems to produce fine results though, can't really say for sure since I don't see which cubes are assigned to the big cubes but at least the big cubes properly encapsulate all relevant areas.
You know what, I had already done that part in fact, just forgot I was using another method than parenting the Cubes to their BigCube...

(I think it was because each Cube origin is 0,0,0 while the bounding sphere we're drawing for the BigCube has its origin at its own center. If we made the Cubes children of the sphere it would mess with the location).
So I chose to use Blender object group instead, that is to say,
the BigCube and its associated Cubes belong to one same group.
You can easily select / hide / unhide all Cubes associated with one BigCubes using Blender shortcuts:
- Select one Cube mesh or one BigCubes sphere
.
- Press [Shift+G] and select "Group" (or [Shift+G] then [7]) to select all objects in this group.
- Press [Shift+H] to hide everything but the selected objects.
That's it, you're only displaying the BigCube and its associated Cubes.
- Press [Alt+H] to display everything again.
Posted: 12 Apr 2015, 00:54
krisss
Hey!
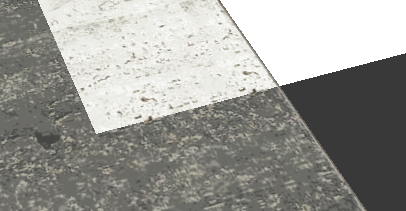
Sorry for interrupting this descussion, I just wanted to ask: how can I add shading to vertexes/faces in blender. I mean, there are some shading going on in original tracks and also extreme custom made tracks, for example, here at nhood2:
What should I do to add something like this to my track?
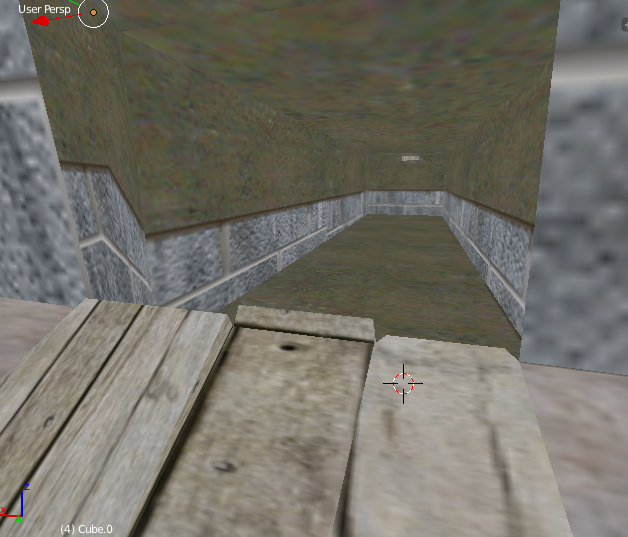
Does it have something to do with this?
I would really appreciate any help or link or something with this trouble.
Krisss
Posted: 12 Apr 2015, 01:39
sebr
krisss @ 11 Apr 2015, 08:24 PM wrote: ...
Does it have something to do with this?
I would really appreciate any help or link or something with this trouble.
Krisss
Look down you'll found this


Posted: 12 Apr 2015, 01:58
krisss
Thanks for response, but, sorry, I just don't get it. Do I have some kind of older version?
What version of Jigebren's plugin are you using?
Posted: 12 Apr 2015, 02:12
jigebren
krisss @ 11 Apr 2015, 08:24 PM wrote:how can I add shading to vertexes/faces in blender.
There's 2 ways to do it:
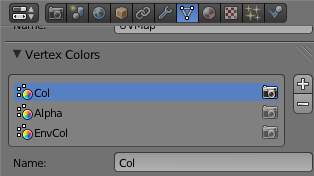
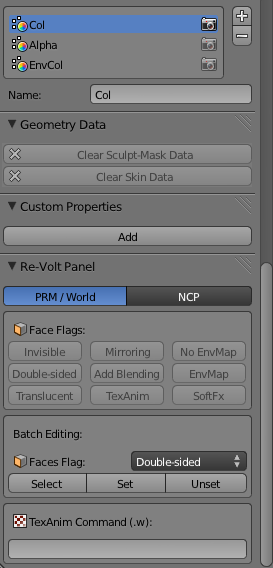
- You can use the built-in Blender Vertex Paint mode: press [V] to switch then read to Blender doc to know how to use it. You just have to ensure that the Col layer is selected in the Vertex Colors layers (your last screenshot), otherwise you're modifying the ENV face color or the transparency (for transparent faces).
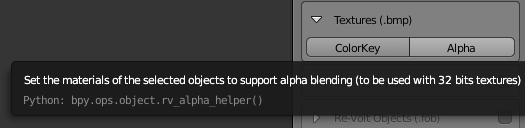
- But for most shading jobs I've added the panel Sebr pointed out to you. This one is used not in Vertex Paint mode but in the regular Edit mode (just ensure to use the "Texture" shading to see the color, "Solid" apparently works only in Vertex Paint mode). The goal was to be able to quickly shade volume without having to use the more complex Vertex Paint mode. You can even select a color if needed.
Last point, there's also an advanced mode in case you - just as I do - enjoy to have vertex color and shadow / light data separated. In that case you can use several layers and there's merged at exporting only. More info in the ReadMe file (changelog of 2014.10.30 release).
PS: and I remember I got messages reporting that your email was invalid, so you may not have the last version. I'll soon send you that now that it's apparently working again.
Posted: 12 Apr 2015, 02:37
krisss
Oh, thanks for info, I will check how this works.
I recieved newsletter, thanks for fixing this issue. Will try both ways, thanks, Sebr for prt screen.
kriss
Posted: 09 May 2015, 23:36
Gotolei
How exactly does one display and edit .hul data? Generally the plugin as a whole has been working like a charm in 2.73 (aside from constant case-sensitivity issues, especially since having the RVGL install run its course, but not sure what can be done about that).
I imported a stock car (Adeon specifically) through its parameters.txt, and toggling the checkmarks under 'Re-Volt Panel' > 'Object Collision (.hul)' either does nothing, glitches out the model or crashes blender.
blender.crash.txt
Granted I'm using linux and going through this thread it sounds like it needs qhull.exe at some point during that process.. does it just crash if qhull can't be loaded?
Posted: 10 May 2015, 00:58
sebr
try to read from
Here : many usefull tips on how to use qhull on linux
Posted: 10 May 2015, 01:20
Gotolei
Worked, though I put it in ~/.local/bin instead of the system-level /bin because I don't feel like breaking things
Seems anywhere in $PATH does the trick.
Is it possible to have it display the frame/spheres working from the parameters.txt, or does the .hul itself have to be imported directly?
Necro-edit: there's a checkbox on the left upon parameters.txt import, "import car collisions"
Posted: 10 May 2015, 01:35
sebr
just tryed to laod a hull (on windows) and nothing work
Posted: 10 May 2015, 05:37
Skarma
You have to imput the .hul file itself. It works perfectly for me as I use blender to fix hulls.
Posted: 10 May 2015, 19:54
sebr
was using blender 2.73a => hul can't be loaded
I try last blender 2.74 => hul work again
with blender 2.73 => work fine too
So it is a Blender 2.73a (and may be 2.73b) bug
Posted: 10 May 2015, 21:29
Gotolei
Working in 2.73a here. :/
Not that I'd know what to do with it, but does it display an error or anything?
Posted: 07 Jun 2015, 15:29
MarvTheM
Hey there,
I can't get alpha blending to work.
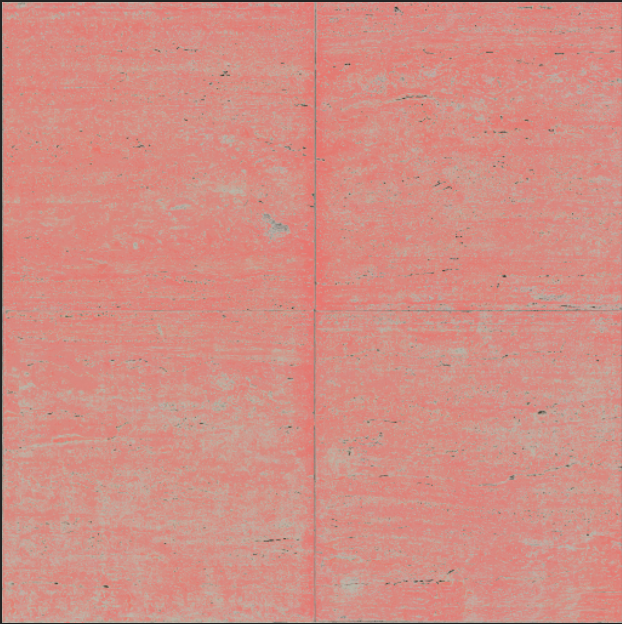
My texture has an alpha channel, some parts more transparent than others.
Looks fine in blender:
However, it looks like this in Re-Volt:
It goes either full transparent or opaque.
I created the plane, applied the texture and clicked on Alpha:
My texture with alpha channel (red=transparent)
I'm using the most recent plugin (BlenderIO_revolt_pyo.[2015-02-27]) with the recommended Blender version.
I got it working before but it seems rather unstable. Or is it just me?
edit: Exporting w and ncp simulataneously still doesn't work, the ncp seems to get corrupted.
I imported a bush1.prm by urne into blender and applied my texture. It works.
I really wonder what I am doing wrong.
For now I will just create materials myself named #00:00:0006:0
I found out that when I click on 'Alpha' no material is being added to the object.
If you're wondering what I'm up to:
Trying to achieve a specularity map-like effect
Posted: 15 Jun 2015, 23:51
Huki
@Marv: From what I remember you also need to set the Translucent flag for each polygon that needs to use alpha blending. Look in the Re-Volt panel in Blender where you set the double-sided, etc. flags and you can find the Translucent flag in the list.
Urne's prm must have had the polygon flags set already, that's why it works with that.
Posted: 19 Jun 2015, 19:24
MarvTheM
Ugh, thanks Huki. That's it. It works great now.
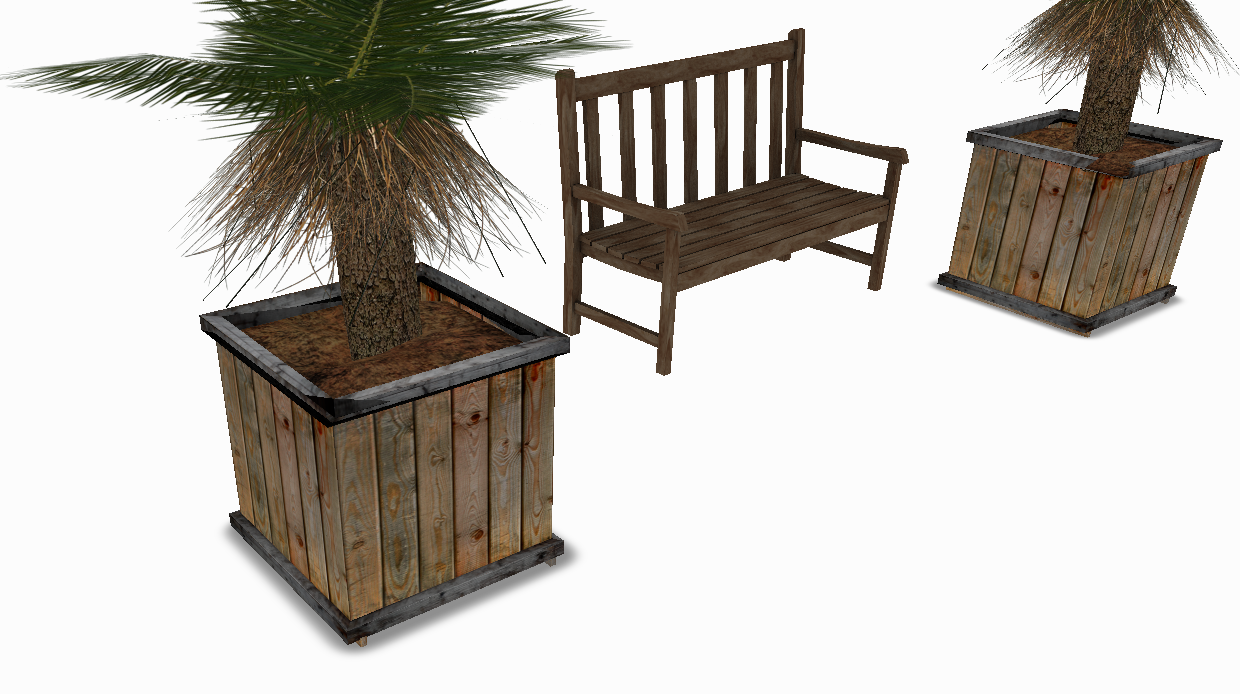
A bit more alpha in action (plants and shadows).
Posted: 19 Jun 2015, 23:11
MightyCucumber
That seems promising Marv, if those models already looked cool, now they are even more top notch!
Posted: 26 Sep 2015, 14:39
Gotolei
More .hul-related fun times.
I've created one using prm2hul (
link) that I can import without problems, but it always fails on export. Created a new hul using different settings (same prm), same problem.
I can export other huls fine, it's just this one that's giving me trouble.
Does it fail if there's no convex outline or something?
Code: Select all
Traceback (most recent call last):
File "/home/raster/.config/blender/2.73/scripts/addons/io_scene_revolt/__init__.py", line 779, in execute
io_hul.export_file(self.filepath, context)
File "io_hul.py", line 300, in export_file
File "io_hul.py", line 217, in export_data
File "io_hul.py", line 35, in export_data
File "io_all.py", line 193, in export_data
ValueError: min() arg is an empty sequence
location: <unknown location>:-1
E: seems the problem was because prm2hul created the convexhull object, but didn't put any data into it
----
Also blender's gone past 2.75, and is currently putting out release candidates for 2.76. Have there been any api changes or anything that would get in the way of this plugin?
